www.industryemea.com
12
'20
Written on Modified on
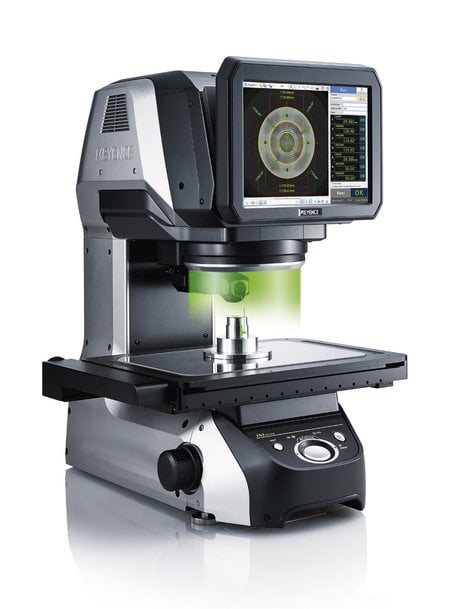
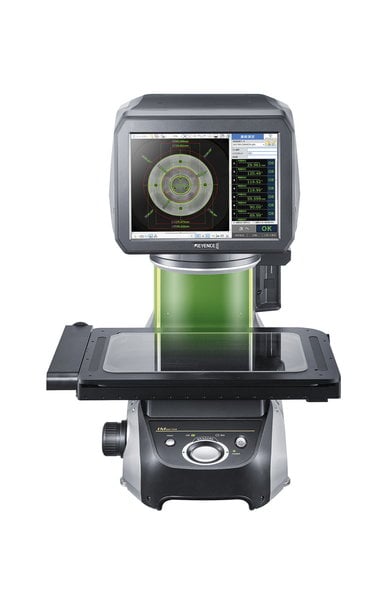
IM-7500 Image Dimension Measurement System takes complex component readings quickly, easily and accurately
Aerotron Avotec is a maintenance and repair organisation in the aviation industry that specialises in the repair and overhaul of a variety of rotary and fixed wing aircraft components for civil and military customers. The company is based in Scotland. Aerotron Avotec is renowned for its technical excellence and meticulous approach to repairs as well as offering one of the lowest warranty rates in the aerospace industry.

Because of the demanding nature of its work, Aerotron Avotec has to work with a wide range of complex parts that can include tiny bearings as well as shafts, gears, brake components, wheels and large outer casings for aircraft undercarriages. Engineers at the company are tasked with inspecting parts to extremely tight tolerances and this can often mean taking key measurements from difficult to access areas. At the same time, readings taken can be of a nature that prevents them from being measured with traditional measurement equipment.

Checking these parts to meet the stringent demands of customers would ordinarily require Aerotron Avotec to acquire expensive, specialist ‘one-off’ measurement tools. For example, a small gear shaft not only needs measurements taken of its external splines but also its internal spline and fixed central shaft. Pin measurements need to be taken to measure gear wear while the bearing lands on the shaft also have to be checked for wear. Normally, carrying out these checks requires three different traditional measurement tools – an external micrometer, a specialist micrometer with calliper jaws to access the central shaft (which is partially enclosed by the internal gear) and a specialist bore gauge with an open centre to allow the internal gear surface (which is obstructed by the internal shaft) to be measured.
After scanning the market for the most suitable solutions to its problems, Aerotron Avotec invested in the IM-7500 optical imaging measurement system from Keyence which has enabled measurements such as those mentioned to be acquired using just the one instrument and in a fraction of the time that it used to take.
At the same time, using the Keyence system has increased significantly the accuracy of measurements taken by Aerotron Avotec, mainly through being able to reduce the amount of human interface involved when measuring the part and with the associated tooling. Once the information gathered is programmed into the memory of the machine, parts of the same specification can be measured quickly and simply with one or two button clicks. This greatly reduces the number of man-hours that would traditionally be spent on such a task.
The IM-7500 Image Dimension Measurement System is designed to be easy to use (with no measurement expertise required) and to measure up to 99 dimensions in just a few seconds, with a measurement volume of up to 300mm x 200mm. Featuring automatic recognition of component position and orientation, the system eliminates positioning errors as well as focus errors and skill level errors.

One of the main benefits that the Keyence system has brought to Aerotron Avotec, then, is to simplify the company’s highly complex measurement requirements. The IM-7500 has not only minimised the potential for human error when taking measurements but has also reduced the number of tools that are required for the task. In some instances, the Keyence equipment has enabled series of measurements that would have needed a few days to acquire to be completed in a couple of hours or even less. The IM-7500 has also allowed measurements to be taken that otherwise would have required the purchase of bespoke tooling.
A spokesperson for Aerotron Avotec says: “The Keyence solution was recommended to us by the manufacturer of one of the items of equipment that we overhaul and repair because they also use it. This was a new departure for us because we hadn’t owned or used any Keyence equipment before. However, we looked at other solutions that were available before opting for the IM-7500 because the Keyence optical image measurement system is the solution we believe most closely matches our requirements.”
Claire Lillywhite, Applications Engineer, Metrology & Microscopy Divisions at Keyence, concludes: “Aerotron Avotec is typical of the kind of customer we are working with when it comes to supplying our advanced and automated measuring systems. Aerotron Avotec demands efficiency, accuracy, consistency and a sound return on investment (ROI) and that’s precisely what we were able to offer.”
www.keyence.co.uk/AEROTRON
www.keyence.co.uk

