www.industryemea.com
13
'12
Written on Modified on
IM Series
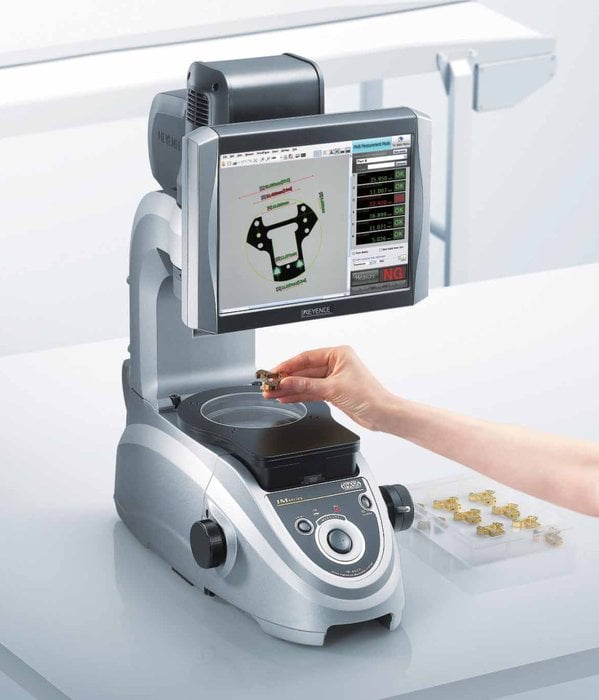
The IM Series is a new type of measurement device. More than a profile projector, a measuring microscope or an automatic CNC measuring device, the dimensional measurement concept by imagery technology of the IM-6000 series is a new system with which it becomes possible to perform reliable measurements in a minimum of time and with an increased accuracy. You simply place the part to be calibrated, push the button and up to 99 dimensions are measured in a few seconds with accuracy down to 0.5 micron. No tiresome positioning, nor risks of measurement variance or deviation between the various operators. Finally, it is a cost saving alternative to traditional processes.

With the IM-6000 dimensional measurement concept, you simply place the part to be measured in the measurement area. The iPASS method (Intelligent Pattern Analysis Search System) performs a shape scanning (from the already recorded targets) to determine its position and its slope.
With the IM-6000 it becomes possible to measure parts whose largest dimension is less than 100mm. The all new double telecentric lens, with a large diameter of Ø 100mm, captures the complete image of the target element, thus allowing the measurement of all the control points at once. With this technology it becomes possible to capture pixels as if the lens was vertically placed. Hence measurement is neither affected by the distortions, nor by the distance. Moreover, the measurement data can be stored digitally and exported as reports/statistics.
Anything can be measured, from internal diameters, circular threads and angles down the most complex dimensions. All this was difficult to measure with traditional methods. From now on, the process is automatic and it reduces the error risks.
Adjustment by the least squares method makes it possible to get a stable detection of edges even if grouping of the edge points is not aligned because of the noise, etc. Additionally, with the IM-6000 series you can perform a stable detection of the edges without taking into account the aberrant edge points even when the target has burs or fragments, source of errors when processed by the least squares method.
The original subpixel concept by KEYENCE makes it possible to detect the position of the edges more accurately than with the traditional vision systems thanks to the subpixel process with a margin of 0.01 pixels. When the edges to be measured are extracted manually, it is practically impossible to prevent the variances from one user to the other just as for errors due to differences in competences. In addition, as the XY turntable movement takes more time, the errors due to vibrations increase. The all new dimensional measurement system by imagery technology does not move the targets with an XY turntable and does not rely on human eye. That was made possible by integrating the high speed image processing technology developed for the automation industry and the optical design technology used in microscopes. Increasing the customers’ results and the quantity of controls should thus contribute a lot to improving quality.
The embedded temperature sensor allows the IM-6000 series to adapt to the customer various environments. By exporting the room temperature data to the measured values, the IM-6000 series provides accurate measurements even in the least favourable environments.
The IM-6000 series is compact (its surface embedded in the surface of an A3 sheet). It is easily mounted near the production lines or in a laboratory.

